Forensics 101: First Archeological Evidence of Buckshot Injuries

Battlefield momument

Battlefield momument

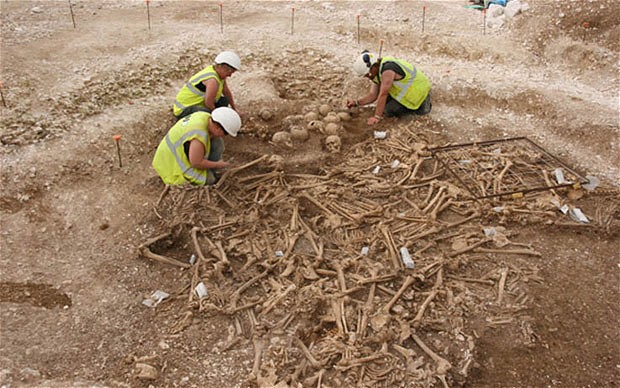
This story is kind of a fun one for me. Not only is it research coming out of my university, but it’s a battlefield site that’s only about 20 minutes from home.

The Battle of Stoney Creek was one of the earlier battles of in the War of 1812 (1812 – 1815). Following the American victory in the Battle of Fort George in Niagara-on-the-Lake, 3,400 American troops camped for the night in Stoney Creek. Even through the British only had 1,600 men, reconnoitering showed them the Americans were badly organized and only thinly sentried with an elongated, broken line of encampment. This was true; in fact, when the battle started, only 1,328 American soldiers out of the total 3,400 were positioned to join the fighting.

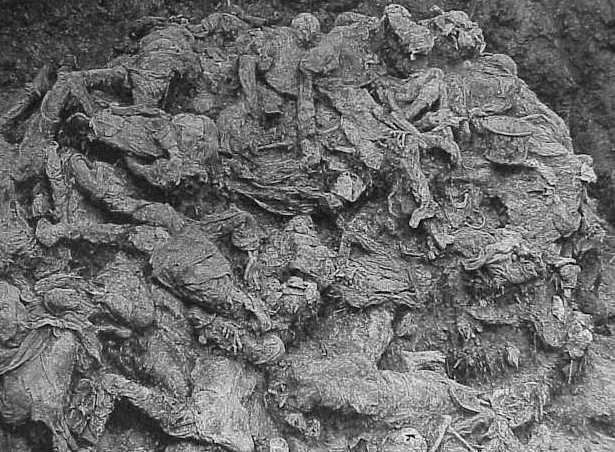
Armed with muskets and bayonets, 700 British troops left their camp at 11:30pm, killing the few sentries on duty before moving in to start the battle proper. However, the Americans held the high ground, firing a variation of the traditional ‘buck and ball’ down onto the British, having loaded their muskets with 12 buckshot balls, essentially turning them into shotguns. The Americans held their position and were well on their way to victory when a gap formed in their line, leaving their artillery unprotected and allowing their guns to be taken and their men killed by the British. In fact, the chaos from the lack of light and the uncharacteristic close-quarters fighting led to American officers coming to investigate what they assumed was a commotion produced by their own men. Instead they were taken prisoner by the British. Without direction from their generals, the American soldiers started to wander aimlessly in the dark and many were cut down by their own countrymen. In the confusion, the Americans pulled back to end the battle, unaware they still held both the superior position and number of men. They retreated back to 40 Mile Creek in Grimsby and then finally back across the Niagara River to U.S. soil, never venturing as far into Upper Canada again. The battle only lasted 45 minutes, but by the end, 39 men were dead, 174 were wounded and 152 were captured. Many of the soldiers were quickly buried on site in a mass grave.

In 1899, farmer Allan Smith unearthed human remains and pieces of cloth bearing both the British and American insignias while plowing his land. That area, now called Smith’s Knoll, was finally excavated in 1998 and examined. The excavation revealed 2701 co-mingled skeletal components from 24 individuals. Skeletal remains showed signs of sharp force and projectile trauma, as well as perimortem (at time of death) fractures. In the past, bone injury from musket balls has been well documented, but archeological buckshot injuries had yet to be verified. Whether the dearth of information of this type of injury comes from a lack of evidence (as the British did not use this type of ammunition; it was only used by the Americans) or because there is simply less bone damage and more associated soft tissue damage from buckshot is unknown.

We’ve shown the damage modern bullets can do to bone, but 0.65 caliber musket balls and 0.31 caliber buckshot of the early 19th century were very different: Made of soft lead, projectiles would often become misshapen upon striking the body. Buckshot especially would often become so misshapen, it could penetrate the body, but could not pass through it. As opposed to modern bullets, lead balls and buckshot would only glance off bone, or penetrate enough to become embedded. High-velocity, through-and-through, jacketed ammunition would not exist for another 50 years.

Smith’s Knoll Scapula with buckshot defect.

Smith’s Knoll Scapula with buckshot defect.

Researchers at McMaster University experimented with cloth-encased butchered pork as a substitute for a fleshed human hip in a soldier’s uniform, test firing both the traditional-for-the-time ‘buck and ball’ (a musket ball with 3 smaller buckshot) and buckshot only (with 12 buckshot per cartridge). Their results indicate that some injuries seen in the Smith’s Knoll remains came from buckshot injuries. Instead of the sharply angled, penetrating defects we’re familiar with today, many of the defects were no more than minor depressions, indicative of a low-velocity projectile that has spent most of its energy penetrating cloth, skin and muscle before striking bone. Some bones had multiple defects, clustered close together, indicating buckshot fire from close range, not allowing the buckshot to separate as it left the musket and flew through the air. Due to the known history of the battle, it is impossible to tell if the skeletal remains are those of British soldiers cut down by American militia, or militiamen felled by friendly fire.

The War of 1812 is a curious thing. It went on for nearly three years, and is considered to this day by Britain to be a minor part of the Napoleonic Wars. The British torched the White House in 1814 and kept the Americans at bay during a number of decisive battles in Southern Ontario (does anyone but a Canadian know the name ‘Laura Secord’?) avoiding being annexed to the United States, but didn’t fare well in fighting in New Orleans or Baltimore. By 1815, when the Treaty of Ghent was signed to bring an end to hostilities, nearly 20,000 men were dead, a military stalemate was called, and the borders remained exactly where they were. However, due to the lack of clear winners or losers, no bad feelings persisted and friendly trade immediately resumed.

Photo credit: Wikimedia commons by Nhl4hamilton and L. Lockau et al

Forensics 101: Space Archeology?

A new term came to my attention last week, one that on first glance seems a bit of a misnomer. It came tied to a really neat story, so we’re going to look at the scientific field this week—what these scientists do and what their work tells them—and then we’ll explore their groundbreaking discovery next week.

The term is ‘space archeology’ or, alternatively, ‘remote sensing techniques in archaeology’ (though I think we’d all agree ‘space archeology’ is WAY cooler). At first glance, one would think this is simply archeology in space, except we’re nowhere near having the skills or technology to do that. So what is space archeology? In the end, the answer is quite clever: it’s using satellite scans of the earth taken from space to identify previously undiscovered archeological sites.

The way space archeologists do their work is quite ingenious. Visible light scans of the planet’s surface may show absolutely nothing. But when infrared scans are used after being processed using false colour, chemical changes to the landscape caused by building materials and the activities of ancient civilizations are revealed. NASA’s high resolution scans are used as the raw data for the analysis, allowing scientists to discern subtle variations in the earth’s topography. The key to this analysis is grounded in vegetation—plants that live on top of stone are simply less healthy and will have reduced levels of chlorophyll. Find the unhealthy plants, and you may be well on your way to finding the site of an ancient civilization.

Enter Dr. Sarah Parcak, an archeologist at University of Alabama at Birmingham. She is responsible for the discovery of several amazing archeological sites, many of them lost for centuries or even millennia. For instance, the picture above shows an infrared scan of what looks to the naked eye like a patch of desert. But move out of the frequency of visible light and into infrared, and suddenly a network of city streets and buildings are revealed. It’s an amazing look at what hides below the earth’s surface. Which city is this? Tanis, the historical city used in Raiders of the Lost Ark, lost for over three millennia to the sands of time. So far only a small trial area has been excavated, but mud-brick structures were discovered a foot below the modern surface.

Next week we’ll be back to talk about an amazing discovery that could rewrite the early history of North America. See you then…

Photo credit: University of Alabama at Birmingham

Forensics 101: Forensic Toxicology

In blog posts over the past four and a half years (!), we’ve covered many aspect of the forensic study of death encompassing forensic anthropology, forensic pathology, forensic odontology, and including many of the techniques used in crime scene analysis such as fingerprinting, shoe and tire casting, and arson reconstruction. But one topic we’ve never covered that can be a crucial part of any death investigation is forensic toxicology―the analysis of chemicals and biochemicals that may be responsible for a victim’s death.

The body of knowledge required for the complexities of forensic toxicology is extremely broad. Not only does the toxicologist need to be familiar with thousands of toxic chemicals ―including narcotics, poisons, prescribed medications, alcohol, and environmental chemicals―but he or she also needs to understand how each of those chemicals interacts with the human body from ingestion through elimination, including the speed of metabolic processing. Not only does the chemical itself need to be identified, but the concentration must be determined as well, since many legal pharmaceuticals can become deadly poisons when taken in excess. The field of forensic toxicology takes into account aspects and methodologies from a number of sciences―analytical chemistry, biochemistry, epidemiology, pharmacodynamics, pathology, and physiology. It’s a very complicated science.

A toxicologist also needs to consider evidence found at the crime scene including prescription bottles, visible trace evidence, and drug paraphernalia. A half empty prescription bottle near the bed might not mean the deceased took all the missing pills at once, but a syringe of heroin still in a drug addict’s arm might indicate that looking at narcotics would be a good place to start the investigation into cause of death.

Often, however, the original chemical is not what the toxicologist looks for; instead, chemical breakdown products indicate a substance's original presence. And while we are mostly considering toxicology as contributing to cause of death, there are multiple uses of toxicology in live subjects as well, some of which we will consider below.

Multiple human samples can be taken for toxicology testing:

  • Urine: While this is one of the most useful, non-invasive samples for drug testing, urine can’t indicate real-time impairment, only prior exposure to a drug. However, it can indicate the presence of chemicals up to several weeks after ingestion. Due to the private nature of sampling, regulations concerning collection must be put in place to avoid sample switching. Urine testing can be used with the living for real-time drug testing (ie. steroid use in sports) or post-mortem to help determine cause of death.
  • Blood: As opposed to urine, blood can be used to substantiate the real time effect of a chemical. For example a blood alcohol level of greater than 0.08% indicates a dangerous and criminal level of impairment behind the wheel of a car. Blood testing is often the main way of determining toxic levels of drugs or chemicals in the deceased (ie. carboxyhemoglobin to prove carbon monoxide poisoning during a fire).
  • Hair: Hair is used to prove long-time drug usage or to indicate exceedingly high dosages transferred from the blood steam. As human hair grows approximately 1 to 1.5 cm per month, the location of a drug in the hair shaft can indicate ingestion over long periods of time. Unfortunately, the characteristics of the hair itself can affect the results with coarse dark hair retaining more of any compound than fair, light hair, which can lead to suggestions of racial profiling.
  • Gastric contents: Depending on the time of death following ingestion of poison or prescription medication, the stomach contents can contain high levels of drugs or potentially undigested pills.
  • Vitreous humor: The vitreous humor is the fluid within the sphere of the eye. As it is isolated from the rest of the body, there is no chemical diffusion, and as the eye tends to putrefy more slowly than the majority of the body’s soft tissues, this allows needle sampling and chemical analysis in more decomposed victims.
  • Maggot sampling: In victims that are found following a prolonged period after death and are in a state of advanced decomposition, sometimes it is not possible to test the body’s tissues. If flies have been allowed to land on the body and lay eggs, and a sufficient time has passed to allow maggot hatching and feeding, the maggots themselves may contain the toxic chemical that killed the victim. Analysis of the maggots themselves may reveal the chemical cause of death of the victim.

Since multiple sample types and many different compounds must be considered during testing, there are many different complicated analytical chemistry methodologies that can be used for the analysis including chromatography, spectroscopy, x-ray diffraction, immunoassays, and mass spectrometry. Despite the complexities, forensic toxicology can often be the field of science to determine cause of death when many other forensic specialties come up empty handed, leading investigators to a better understanding of the victim’s life and death.

Photo credit: Horia Varlan

Forensics 101: A New Technique to Pinpoint Time Since Death

One of the very first forensics posts on Skeleton Keys was about using decomposition to pinpoint the time since death for fleshed bodies. As we mentioned back then, there are some fairly precise ways to measure time since death in first hours following death, up until 24—48 hours post-mortem. But after that, things are much less exact. Needless to say, this can be a problem for investigators who are trying to pin down suspects who need to substantiate their whereabouts with an alibi. But if the best you can do is a 24 hour period, it can be hard for even an innocent person to list all their movements. And what if the investigators are looking at the wrong 24 hour period due to an inaccurate estimate? A more precise way to identify time since death after the immediate post-mortem period would be a welcome tool for investigators.

A team of researchers who recently published in Toxicology Research may have an answer to this dilemma. Their original study set out to examine the changes in 46 biochemical blood parameters to develop a reliable mathematical model to determine time since death. Using 20 normal human blood samples, drawn, aliquotted, and left to coagulate normally, they temperature controlled blood cooling to mimic the typical drop in human body temperature after death—from 37oC to 21oC, decreasing 0.5oC per hour. They then started a kinetic (in time) analysis of the properties of the blood including pH measurements, protein, lipid, enzyme, and electrolyte levels and activity. Of the 46 parameters, ­­­­10 were found to be statistically significant in estimating time since death: total and direct bilirubin, urea, uric acid, transferrin, immunoglobulin M, creatine kinase, aspartate aminotransferase, calcium, and iron. Using these markers, researchers suggest that investigators and forensic scientists will be able to much more precisely pinpoint the time of death out to 11 days after death.

While the results are promising, the authors outline future areas of study as these experiments were done in vitro (outside the body) and under very controlled circumstances. Samples from deceased individuals of known time must also be studied for corroboration. In addition, multiple variables must be considered such as age, gender, body mass, cause of death, and length and type of stress at the time of death. External factors may also play a part—environment and temperature, humidity or precipitation, clothing, or whether the body is buried or left out in the open and possibly infested with insects or consumed by animals. So while there is a lot of research still to do, it’s definitely a very solid starting point from which to launch further research opportunities. Perhaps in a few years, investigators will have a dependable way to identify the time of death of individuals, making their search for suspects a more informed process, hopefully leading to better conviction rates.

Photo credit: Costa et al. in Toxicology Research

Recent Advances in Fingerprinting

While we were on writing hiatus over the summer, several stories made the news concerning advances in the forensic field of fingerprinting. Since they included several new techniques, I thought it would be good to cover them in a single post here on Skeleton Keys, where we always try to stay up to date with the newest in forensics.

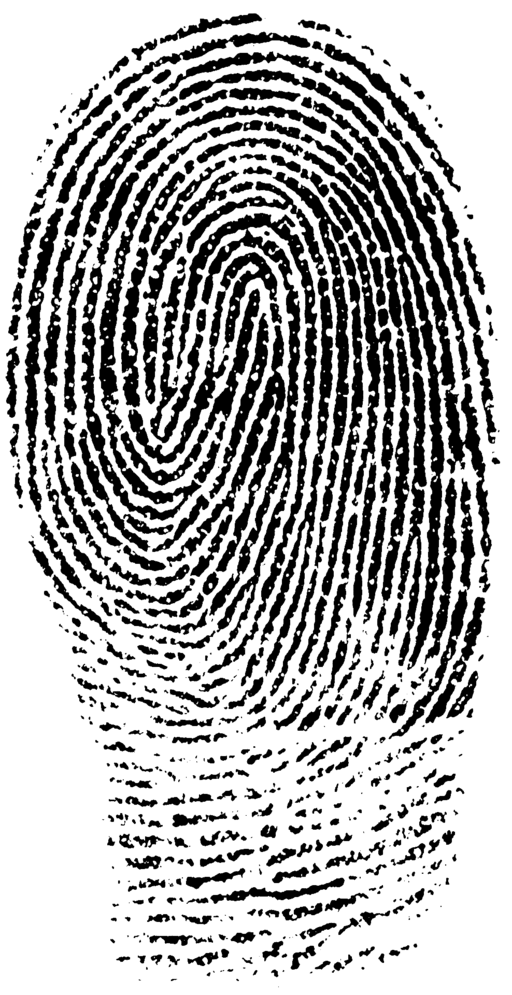
Fingerprinting involves identifying an individual by their unique pattern of arches, loops, and whorls on the ridges of the fingertips. Invisible oils and other biomolecules are laid down on a surface, and crime scene techs visualize those scant traces through a number of methods. Those prints are then compared to a local, national or international database and, hopefully, a match is made and a perpetrator is identified.

But a person’s identity may not be the only thing revealed by his fingerprints, as was recently announced:

  1. Determining the use of illegal drugs: Researchers from the University of Surrey in England have developed a method to test the residue left in a fingerprint for cocaine using mass spectrometry. More importantly, based on the drug metabolites, it can be determined whether the cocaine was ingested, or whether the suspect simply touched it and traces of the drug remained on his fingertips. New portable mass spectrometers are being developed to make this a technique that can be used in the field at actual crime scenes.
  2. Fingerprint Molecular Identification (FMI) technology to identify gender, narcotics and nicotine: North Carolina’s ArroGen Group has developed FMI technology, again using mass spectrometry, to identify gender biomarkers, as well as metabolites of nicotine, heroin, methamphetamine, marijuana, temazepam, ecstasy and even some legal medications. This panel of distinctive chemical substances could lead to suspect identification as well as criminal convictions.
  3. Determining the age of a fingerprint: Researchers at the National Institute of Standards and Technology have developed a method to approximate the age of a fingerprint. This has always been a problem using fingerprints as criminal evidence—a print might prove an individual was in a particular location, or touched a particular object, but was it at the time of a crime, or the week before and therefore possibly insignificant? Scientists have tried to develop a method to date fingerprints based on the breakdown of the biochemical products in the fingerprint, but to no avail. However this method is different and depends on the movement of biomolecules from the ridge to the empty valley sections of the print. Essentially the clearly defined lines in a fresh print will blur and become indistinct with time. How much so will help scientists date an individual print. So far, scientists have been able to distinguish between a day and a week old, a week and a month old, and a month and four months old. This is still a proof-of-concept method, but researchers are working to fine tune the technique, which could be incredibly useful in criminal investigations.
  4. Determining race of an individual: We’ve previously discussed how to determine race from a victim’s skull, but researchers from North Carolina State University recently announced a technique to determine race from the minutiae of the fingerprint. In a nutshell, there are three levels of examination for a fingerprint. The first level is the one most people are familiar with—those ridge formations called arches, loops, and whorls shown in a standard ink print. The second level is the minutiae—the deviations of those arches, loops, and whorls—where a ridge ends, when it splits in two at a bifurcation, or where the ridge makes a U-turn in a loop or whorl. In comparing those from African-American and European-American backgrounds, researchers found significant differences at the minutiae level, enough to be able to determine from which group the individual came. The study only involved 243 subjects, so these are very preliminary results, but so far the data appears promising.

It is early days so far for many of these techniques, but, with additional study, hopefully they will develop into full-fledged tools for investigators, providing them with more information and hopefully leading to more definitive suspect and victim identifications.

Photo credit: Wikimedia Commons

Forensics 101: Digital Investigations and Cybercrime

The last of the forensics panels at Bloody Words XIII led us into the fascinating world of cybercrime. Our guide for the hour was digital forensics investigator Michael Perkin. Michael walked us through a couple of his cases (with all the specifics removed, of course) to give us a taste of how the bad guys were caught.

A case of defamation:

  • A string of terrible allegations of was posted in a series of blog entries.
  • The perpetrator then created a Gmail account to email the victim’s family, friends and colleagues links to the blog posts.
  • Enter Michael. The first step in any digital investigation is the forensic acquisition of data. Never work from the original but make a full copy of all drives onto brand new, blank drives. Then the analysis can begin.
  • Michael was able to analyze the email headers and trace the emails back to a specific internet provider. This is turn led back to the perpetrator, someone known to the victim.
  • A judge  issued an ‘Anton Piller’ order—the search and seizure order from the civil side of law (as opposed to a standard criminal law order).
  • The perpetrator had 30 minutes as the law allows to consult with his lawyer before the search could begin. He spent that entire time on his computer. When the computer was recovered, the desktop and documents folders on the hard drive were all blank. Except they really weren’t.
  • Michael then drew the analogy of a hard drive being like a book (it was a writing conference after all!). The book has a table of contents and information on every page.
  • The table of contents is what the computer considers the ‘master file table’—this keeps track of all the files on the computer.
  • When the perpetrator deleted all the files, all he really did was remove the table of contents—the file index—leaving the information still in place.
  • All Michael had to do was read through all the information on the drive and all the data required to convict the perpetrator was right there.

The complicated bounce:

  • A computer at a company was suddenly locked out by a remote user.
  • Michael came in to investigate, copied all the files, and analyzed the data.
  • He discovered that the computer was accessed from another computer within the organization, which was accessed through another computer within the organization… rinse and repeat through numerous bounces.
  • Michael was finally able to access the high value computer that was the actual target and discovered that data had been copied from it. But to where?
  • In the end, it was the perpetrator’s printer that gave him up. No matter where he had bounced, each connection mapped back to his networked printer. So the final link in the chain could be mapped back to the perpetrator’s printer and, from there, to his computer and to him.

Bitcoin and its potential for cybercrime:

  • Bitcoin is essentially a protocol. Just like email is a protocol to send messages over the Internet, Bitcoin is a protocol to send money over the Internet.
  • Bitcoin has an address and a key, just like email has an address and a password. Both are an extremely long alphanumeric string.
  • Bitcoin information can be stored on a computer, on a USB key, in a barcode, on a printout, or in your memory. This last is important as border crossings have a $10,000 limit to cross without reporting. But your Bitcoin account could contain millions of dollars and if you cross the border with the account and key memorized, you can circumvent reporting the money you ‘carry with you’.
  • You can access your money from anywhere in the world. You can also send any amount of money to anywhere in the world.
  • You could keep your printed Bitcoin key in a safety deposit box. Every time you deposit money into your Bitcoin account, you are essentially beaming it straight into that safety deposit box since it can’t be accessed without that key.
  • People have accessed funds when in trouble simply by finding a public access—like television—and broadcasting their Bitcoin address in a 2D barcode with ‘Send Money’.
  • Previous ID theft required a victim’s name, birthday, and social insurance number to steal your money. Now all that is required is your Bitcoin key.

Nifty facts about digital forensics:

  • There are three types of space on a hard drive:
  • Allocated space—sections of the drive used to hold files; these sections are listed in the table of contents/master file table.
  • Unallocated space—sections of the drive that aren’t in use; these sections are not listed in the table of contents/master file table, but still may hold information.
  • Slack space—Back to the book analogy: Suppose that a full page of information is deleted from the table of contents. That space is now considered unallocated. If half of that page is overwritten with new information (listed in the table of contents) the remaining half page of old information—the portion of the allocated space that is not used—is considered ‘slack space’.
  • The only way to truly destroy data on a drive is to overwrite it multiple times. Data destruction software does this by simply writing 1’s and 0’s to the drive. Military protocol demands the drive be written over 10 times to consider the previous information truly ‘deleted’.
  • If you truly need to secure your computer, take it off the internet and lock it in a room where only limited people have access through physical keys.
  • Computers silently record everything we do through printer mapping, file edits, program usage and your browsing history (yes, even when you delete the cache). A skilled investigator can trace you through any of these pathways.

Photo credit: Benjamin Doe/Wikimedia Commons

Forensics 101: Fingerprinting Techniques

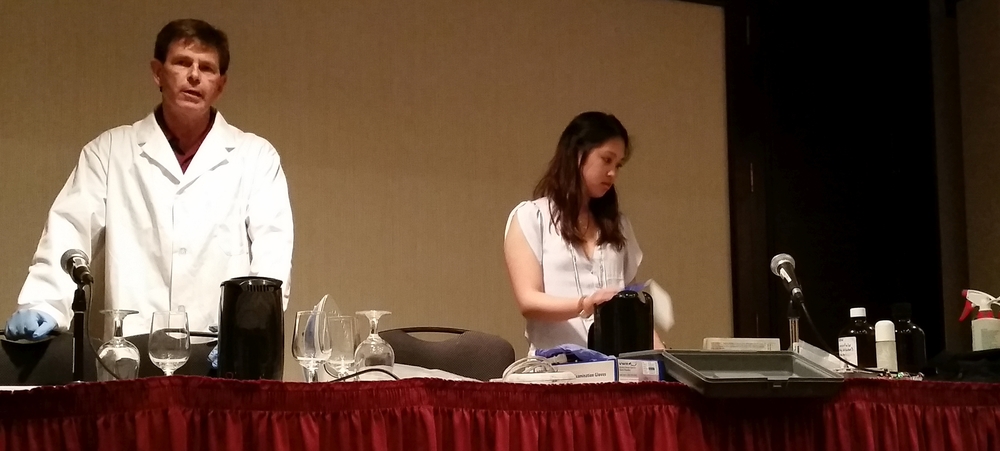
Today I’m continuing with my series of session reviews from Bloody Words XIII earlier this month in Toronto. I was interested in a session called CSI: Toronto, but when retired forensic identification specialist Wade Knaap arrived (with his graduate student apprentice) and started pulling out bottles of chemicals, I knew we were in for a treat. Sidenote—as a practicing scientist, I couldn’t help but wince every time Wade picked up his Tim Horton’s coffee in his gloved hand to take a sip. Just…no.

A Detective Constable for many years with the Toronto Police Service, Wade is now retired and teaching forensic identification at the University of Toronto. He spent an hour teaching us some of the tools of the trade when it came to fingerprint identification, specifically with latent prints—prints that are invisible to the naked eye until something is used to develop them.

First he dealt with fingerprints on a porous surface, i.e. paper, thermal cash register bills, currency.

Black magnetic powder: Investigators use a magnetic wand to pick up the fine magnetic powder (the powder comes in many shades, so there is always a contrasting shade available no matter what the background colour). The powder is gently swiped in a ciruclar motion over the latent print. The moisture in the print attracts the powder and the latent print is revealed. Unfortunately, any moisture will attract the powder in the same way, so if there is a latent print on a bottle with beer splashed over it, the powder will stick to the entire bottle. If a latent print is successfully detected and isolated, it can be lifted with tape to be photographed and entered into evidence.


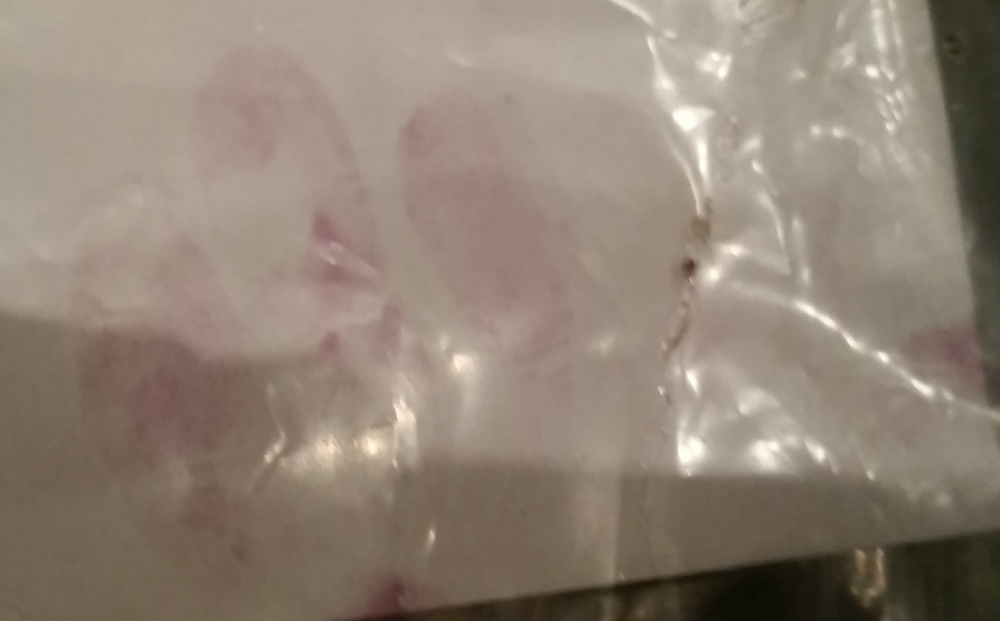
Ninhydrin: This chemical reacts with the amino acids in fingerprints to produce a purple colour. A paper with a potential print is soaked in ninhydrin and allowed to air dry. Then the paper is exposed to steam. Any prints present will turn purple. These prints can then be further enhanced with a light source and photographed.

Wade then moved on to non-porous surfaces like a wall or solid object.


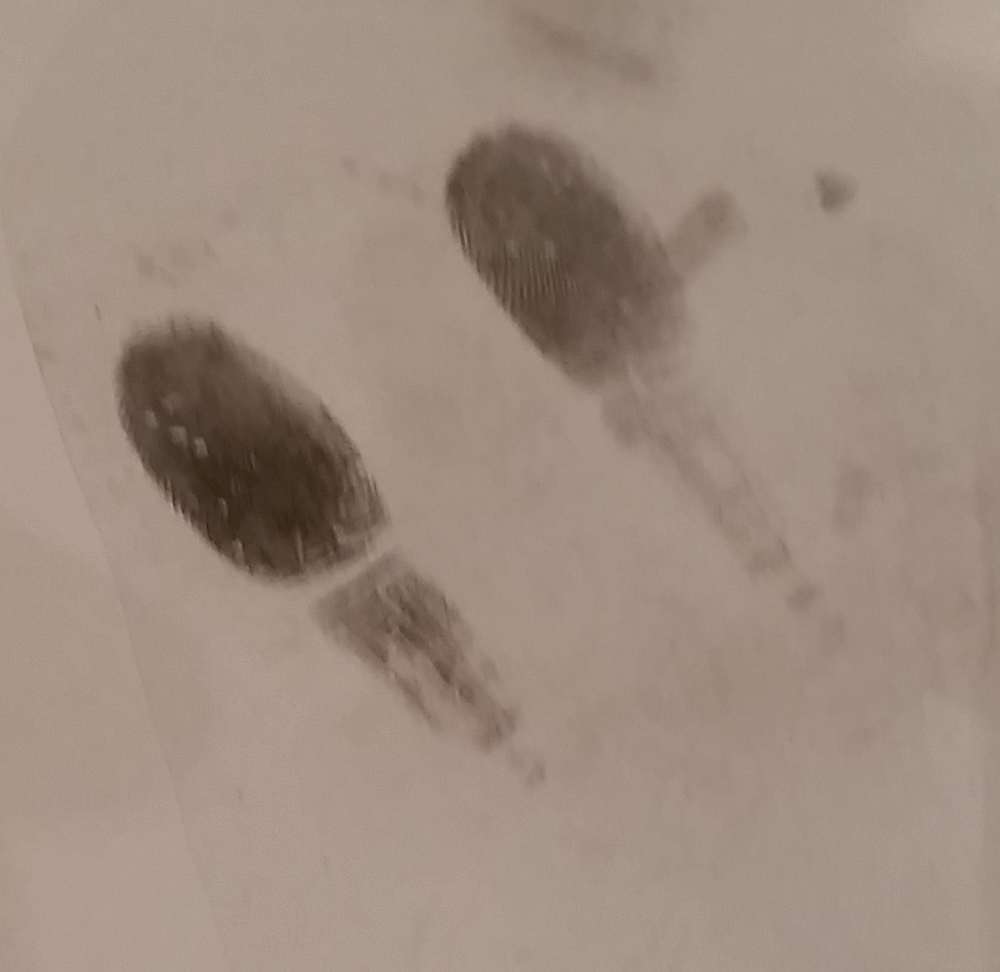
Cyanoacrylate (superglue): This is a popular one with the current forensics shows. You see them put an object with a potential print into a airtight box with a small tray of water and some superglue on a heated plate. As the plate temperature rises, the superglue vapourizes and the gaseous glue particles bind to the protein and amino acids in the fingerprint, polymerizing and plasticizing the print, creating a three dimensional permenant version. This procedure is very useful on handguns, where the gun oil required for regular maintenance would produce an extremely high background with most fingerprinting powders. If a dye is added to the superglue, a forensic light can be used to reveal the fingerprint. If the sample is in the field and can’t be moved into the lab, a portable cyanoacrylate torch can be used at the scene. However, great care must be taken as the temperature to vaporize the superglue is only somewhat below the temperature to produce deadly cyanide gas.

 
20140606_205409_cropped.jpg

Amido black: This chemical is used solely for blood impressions that are too faint to see clearly or use for identifcation purposes. Faint impressions are sprayed with amido black and then the reaction is chemcially stopped. After a final rinse with water, the formerly faint impressions are a vivid permenant black.

Some fun facts about fingerprinting:

  • Luminol is simply a blood locator that enhances small amounts of blood. It does not give big glowing prints like you commonly see in crime shows.

  • Light sources can be very useful in finding bodily fluids. But unlike how this technique is fictiously used in crime shows, while it does light up semen or vaginal fluids, it will never light up blood spatter.

  • None of the above tools are able to pull a reliable fingerprint from a live person without transferring that print first; there’s simply too much moisture. However you can do this from a cadaver using either magnetic powder or a process of iodine fuming and silver plate.

  • Canada’s fingerprint database is run by the RCMP nationwide allowing for countrywide comparison. However, each state in the United States runs its own system, so to search outside an individual state, investigators must apply for national searches. A reciprocal agreement exists between Canada and the U.S to allow for open access for print searches between the two countries. Outside of Canada and the U.S., application must be made to Interpol for further searches.

  • There are three types of prints: a deposited print (like a latent print from oily fingers), a takeaway impression (where, for instance, a dusty surface is touched and the dust is removed only from the point of contact), or a molded impression (if fingertips touch wet paint, leaving a 3D impression of the print behind).

  • Canada recently issued new dollar bills made of polymer instead of paper. Porous techniques no longer apply to these new bills; instead, the superglue fuming technique must be used to develop latent prints.

  • Unlike in CSI, overlapping prints cannot be taken apart and put back together to make a full print with multiple points of comparison. When prints overlap, the only parts of the print that are usable are the sections that are completely isolated and not in contact with any other print. This greatly decresases the chances of successfully identifying the print.

Next week, I’ll be back with my final forensics session review when I’m going to talk about cybercrime and the new threat presented by Bitcoin.

Forensics 101: A Primer on Blood

I’m recently back from the final Bloody Words crime writer’s conference, so, over the next few weeks, I’m going to share some of the fascinating information I learned at some of the panels I attended. This is the third time I’ve attended this conference, and while they always excelled at having lots of sessions pertaining to writing, they also had multiple sessions on forensics and procedure, taught by in-the-field professionals.

The first session of the conference was forensic hematology, presented by Margo French, a medical lab technologist. Margot has worked in the field of hematology (the study of blood, its cells and organs and blood-oriented diseases) for decades. She has been called as a trial witness on many occasions, so she’s familiar with lab techniques in criminal investigations.

Blood basics:

Blood can be broken down into two components—liquid and cellular. The liquid component, the plasma, makes up 55% of the total blood volume, with the combined cells making up the remaining 45%. 

Red blood cells (RBC):

  • RBCs are the overwhelming cellular component in blood, making up about 60% of the total cellular volume. A single drop of blood has approximately 3.4 million RBCs.
  • RBCs are the only cells in the body that are non-nucleated (have no DNA in the form of chromosomes). Cells develop in the bone marrow and start off having nuclei, but when they leave the marrow 7 days later, they are non-nucleated. Nucleated RBCs in the blood stream are destroyed by the spleen.
  • RBCs live for approximately 120 days.
  • The main purpose of RBCs is to carry oxygen to the tissues and carbon dioxide from the tissue. To accomplish this task, RBCs contain hemoglobin to bind the compounds for transfer within the body.
  • The key to gas transport is the iron ions that are an integral part of the hemoglobin molecule. The iron you’re born with can stay with you for life, and is constantly recycled during your lifetime. When RBCs are destroyed, a type of white blood cell called a macrophage uptakes the iron and transports it back to the storage pool for reuse.

White blood cells (WBC):

  • WBCs make up approximately 20% of the total cellular volume. A single drop of blood normally contains between 3,500 and 8,000 WBCs.
  • The WBC complement is part of the human immune system and is made up of lymphocytes (including natural killer cells, T cells and B cells), basophils and eosinophils.
  • WBCs vary in size based on cell type, but are generally about twice the size of a RBC.
  • The life span of different WBCs also vary, but lymphocytes can live for years. Lymphocytes are the cells that recognize specific pathogens and, in the presence of a pathogen, will signal and then mount an immune response against it.

Platelets:

  • Platelets are not intact cells. They are actually tiny pieces of cytoplasm from bone marrow cells called megakaryocytes.
  • Platelets are approximately 1/4 the size of a RBC and 1/8 the size of a WBC.
  • Platelets make up approximately 20% of the total cellular volume. Because of their size, a single drop of blood contains 150 – 400 million platelets.
  • Platelets work with coagulation factors to stop bleeding. When the skin is cut, RBCs rushing to the site form a mesh. Platelets arrive at the site, swell, and become sticky. They then enter the mesh, filling the holes and creating a solid barrier, stopping the outward flow of blood.

Plasma:

  • Composed of 95% water, plasma also contains proteins, clotting factors, hormones, electrolytes and glucose.
  • Its main function is as the medium that holds the blood cells in suspension, and allows the flow and transport of cells, nutrients, and waste products around the body.

Some interesting facts about blood in criminal investigations:

  • While thought to be a modern investigative tool, the chemical locator ‘Luminol’ dates back to 1901.
  • The first time blood analysis was used as part of an investigation was in 1937.
  • Blood and fingerprinting used to be an investigator’s primary identification tools. But both techniques have been eclipsed in recent years by DNA, as this is the only technique which can completely exclude a suspect (all other tests have a certain percentage of false negatives).
  • Information carried in the blood can denote blood type to include or exclude suspect. DNA obtained from white blood cells can be used for definitive identification.
  • The difference between many species and human blood is not easily discernable, so serology—the study of human plasma—is used to identify human blood.
  • Blood is also used for chemical testing, i.e. blood alcohol and bloody glucose analysis.
  • While not covered in this blog post, blood at a crime scene can indicate the mechanics of the crime, i.e. bloody carrying or spatter.

 Next week, we’re going to look at fingerprinting techniques, especially when investigators are faced with latent (invisible) prints.

Forensics 101: Fire Investigation

Last week we talked about some of the basics of what is involved in fire investigation and who takes part. This week we want to look more closely into what is involved in a fire investigation.

Before even setting foot inside the cooled and potentially stabilized building, a thorough investigation takes place outside the structure, taking into account an arsonist’s possible entry and exit routes, existing sightlines for any potential witnesses, and evidence external to the scene (sometimes this is the only intact evidence that escaped the fire). After entering the scene, the fire investigator is focused on two primary issues—the fire's point of origin and its cause.

To determine the point of origin, the investigator essentially needs to create a virtual reconstruction of the site as it existed before the fire based on burn and fire protection patterns. This requires analysis of the fuel involved in the fire, ventilation, the direction of spread, fire duration, and the materials involved. After reconstructing the flow and outward spread of the fire, the investigator can then follow it backwards to where it started.

What knowledge and tools must a fire investigator have at his disposal to reconstruct the devastation of a fire scene? In A FLAME IN THE WIND OF DEATH, Trooper Bree Gilson of the Massachusetts Fire Marshal’s Office uses a combination of all these strategies to determine the point of origin:

  • Fire dynamics: Fire investigators must be intimately aware of the driving factors in any fire—heat transfer and the buoyancy of hot combustion gases. If those gases reach a temperature of more than 500oC, they become visible as a fire plume. The larger the fire, the taller the fire plume and the more hot gases and particulate matter rise above it in the smoke plume.

  • Heat transfer patterns: How materials are affected by fire varies with the characteristics of that material—its melting temperature and thickness (thin materials transfer heat more rapidly than thick materials). Direct exposure to flame will also affect a material faster than radiant heat. Since the most severe thermal damage and the associated highest temperatures often indicate the point of origin, heat patterns on walls and ceilings will often reveal the location of the initial fire.

  • Soot layering: Soot—composed of carbon particles produced by the incomplete combustion of organic material—is a by-product of fire. These particles are contained in the hot gases and smoke that rise above the fire plume, spreading outward along the ceiling. When those hot gases encounter colder surfaces of the structure that are not yet involved in the fire, the soot particles condense in a layer on that surface. Therefore, if a part of the structure that was fully involved in the fire also shows evidence of soot, then that area of the fire started after the initial blaze.

208294792_5b49c92124_by_ DaveBleasdale.jpg
  • Knowledge of materials: The behaviour of materials in a fire, i.e. the temperature at which thermal damage will affect that material, is crucial in fire investigation. For instance, copper will melt in an 1100oC fire, but steel and iron will not. Glass will melt at 760oC, but if heated to lower temperatures and then rapidly cooled by water spray, a web of microfractures called ‘crazing’ forms within the structure of the glass. Study of the materials in a fire will indicate where the fire started (heavier thermal damage will be located nearest to the seat of the fire), and also provide the direction of travel.

  • Interviews with firefighters: Structure conditions can change rapidly while crews extinguish the fire. Often windows are purposely broken by firefighters to ventilate the fire, so post-fire structure condition does not necessarily indicate the initial state of the structure. Interviews with firefighters will indicate conditions at the time of their arrival, as well as throughout the operation. Smoke and ventilation conditions—if doors were left open or if windows were open or broken at the time of arrival—can indicate the direction of travel of the fire prior to the fire fighters’ arrival.

  • Full photographic documentation: Once the scene is released and outside individuals are allowed access, the scene can no longer be considered as untainted evidence. Photographs of the state of the scene prior to release are crucial for later reference and courtroom testimony. Also, since burned structures may be unstable as water-logged walls fall or hot spots rekindle, prompt photos are crucial to document the scene as soon as possible after the fire. Since roofs often collapse during a fire, crucial evidence may be obscured by debris landing inside the structure. Sequential photos must be taken as layers of the scene are removed, revealing additional evidence.

  • K-9 investigators: Many fire departments are assisted by K-9 team members who are trained to isolate and locate the smell of chemical accelerants, helping to determine both the point of origin and the cause of the fire.

In cases where a K-9 has not identified an accelerant, the cause of the fire must be determined after the point of origin is located. In some cases, a fuel or heat source may be self-evident by the presence of a heated appliance such as a stove or iron. Some fires clearly lead back to wall sockets, extension cords, or small electrical devices that have failed or been misused. If an accelerant is suspected, samples can be taken from the point of origin for chemical testing.

Next week, we’re going to look at criminal fire investigations and the challenges of collecting evidence when your scene has been destroyed.

A reminder to our readers that A FLAME IN THE WIND OF DEATH will release April 18th and be available shortly thereafter. This is the third installment in the Abbott and Lowell Forensic Mysteries, following DEAD, WITHOUT A STONE TO TELL IT, and the e-novella, NO ONE SEES ME ‘TIL I FALL.

Photo credit: State Farm and DaveBleasdale

Forensics 101: Forensic Dentistry

Following last week’s post about determining a victim’s age at the time of death using their teeth, it seemed appropriate to take a brief look at the field of forensic dentistry (also called forensic odontology). Here on Skeleton Keys, we tend to focus more on forensic anthropology as that is the science of Dr. Matt Lowell of the Abbott and Lowell Forensic Mysteries, but forensic dentistry is an important field that is often used in conjunction with forensic anthropology.

Forensic dentistry is the application of the practice of dentistry in criminal investigations. Often, the type of remains that leave investigators requiring the services of a forensic anthropologist may also benefit from a forensic dentist, and the two scientists will often work cases side-by-side. Forensic dentists work by comparing antemortem (before death) dental records and x-rays with post-mortem (after death) remains. They are often involved in mass casualty incidents when remains are too decomposed, damaged or fragmented for more standard identification procedures like fingerprinting or DNA.

In 2010, when I attended the Bloody Words mystery conference in Toronto, I was fortunate enough to sit in on a lecture from Dr. Ross Barlow called ‘Teeth Talk: The World of Forensic Dentistry’. Dr. Barlow had been involved in the identification efforts following the 2004 Boxing Day Tsunami that devastated South Asia. Forensic dentists were called in to assist, not because of the initial nature of the remains, but because of the sheer number of bodies (130,000 in Indonesia alone), and the inability to refrigerate the corpses in the tropical heat. Decomposition became a major complicating factor, so skeletal component identification was one of the most successful methods of identification.

Victim identification is the overwhelming task of a forensic dentist, comprising approximately 95% of their cases. But forensic dentists contribute on multiple levels to criminal investigations:

  • Victim age at time of death: As mentioned last week, aging a victim based on tooth eruption and development.
  • Bite mark assessment: Bite marks are common in cases of aggravated assault and abuse. Forensic dentists assess and compare the marks on a victim with the bite pattern of a potential assailant. Also, while the field of veterinary forensic science (including odontology) is in its infancy, human forensic dentists are often involved in criminal prosecutions resulting from dog attacks and the prosecution of dog-fighting rings to match dog bite marks to individual dogs.
  • Identification of remains: Identification is based on both common and unique gross tooth characteristics, as well as past dental work, including fixtures and fillings.
  • Identification of fire-damaged remains: During extensive fire exposure, the front teeth are the first to be lost. Tooth enamel dehydrates and sloughs off the dentin. But identification can be determined in severely damaged remains by antemortem root canals and matching antemortem fillings.
  • Race determination: As we discussed when covering race determination from skull attributes, the incisors of people of Asian or native descent are shovel-shaped with ridges on the rear surface of the tooth. Those of white or black descent, have blade form incisors with a flat profile.

Like forensic anthropologists, forensic dentists are often called in to view the most badly damaged or decomposed remains. Working with investigators, they can indicate or confirm identification, or assist in trauma assessment. In mass casualty disasters, such as 9/11, floods, earthquakes, tsunamis or plane crashes, they may be the only ones able to identify the dead, giving them back their names, and allowing their families much needed closure.

Photo credit: Wikimedia Commons


Its giveaway time again! Stop by Goodreads until Thursday night at 11:59pm for the chance to win a signed ARC of A FLAME IN THE WIND OF DEATH. Enter here!

Forensics 101: Determining Age at Death Using Dentition

When it comes to unknown victim identification, there are three main pieces of information a forensic anthropologist can contribute to an investigation—sex, race, and age at the time of death. In some cases, time since death can also assist in narrowing victim identification based upon reports of the last time the victim was seen alive. Previously, we’ve covered various ways to determine the victim’s age at the time of death based on epiphyseal fusion or the adult pelvis, but several other methods exist and are also in use. One of the least sexy—but most useful—ways to determine age at the time of death is to use the victim’s teeth.

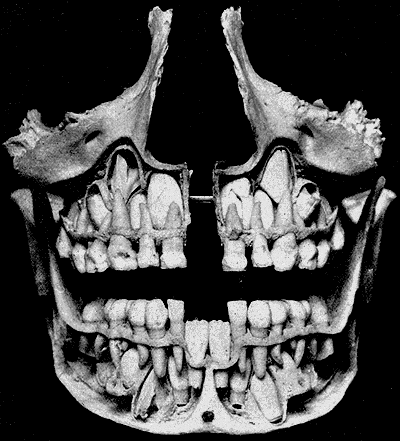
This method relies on the fact that, throughout childhood, baby teeth are lost and new teeth erupt according to fairly predictable developmental time points. Even more so than epiphyseal fusion, tooth loss and gain holds to a more rigorous chronological schedule.

There are four notable time periods of tooth development in growing children:

  • Deciduous baby teeth emerge during the first two years of life.
  • The first two permanent incisors and the first permanent molar emerge between 6 and 8 years of age.
  • The majority of the remaining permanent teeth erupt between the ages of 10 and 12 years of age.
  • Wisdom teeth tend to erupt around 18 years of age.

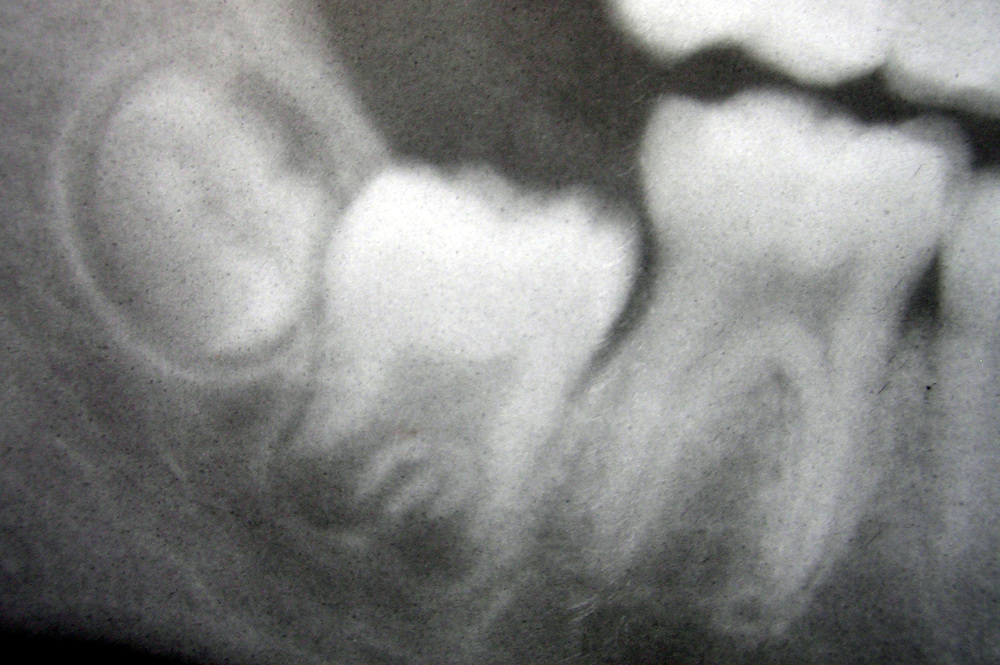
In addition, the development of permanent teeth within the skull before eruption occurs can help indicate age. This can be clearly seen in x-rays taken by a coroner or medical examiner.

Using dentition to age adults is a more challenging practice. Once the wisdom teeth have erupted, only morphological changes within the teeth indicate age differences. These changes can include:

  • Tooth root translucency increases with age, independent of periodontal damage.
  • Dental wear on the teeth; this tends to be a predictable variable within populations.
  • Ratio of the amino acids D-aspartic acid to L-aspartic acid in tooth dentin. The L form of any amino acid is the mirrored structural image of the D form. Amino acids begin in the L form and convert with age to the D form, so a preponderance of the D form indicates increasing age. 

Especially in children, the use of dentition can be very helpful in victim identification by minimizing the estimated age range. Used in conjunction with other methods, such as epiphyseal fusion, forensic anthropologists can be quite exact in providing age related information to investigators.


It’s giveaway time! I’m giving away a signed ARC of A FLAME IN THE WIND OF DEATH, so be sure to enter for your chance to win!

a Rafflecopter giveaway

And watch Goodreads starting on Friday for another chance at a giveaway here! (Please note, this link won’t be active until Friday, but I’ll remind you again next week!)

Photo credit: Wikimedia Commons (skull section) and Wikimedia Commons (developing teeth)

Forensics 101: Mass Grave Methodology

The first hurdle to overcome in mass grave investigations is determining the location of the grave. As we discussed last week, mass graves are deliberately hidden to avoid detection, so simply finding the grave is the crucial first step. To further complicate the process, there are often one or more satellite sites associated with mass graves:

  • the execution site (either a surface execution site or a site within the grave itself)
  • temporary surface deposition sites used during the transfer of remains from primary to secondary and tertiary sites.

But once the final grave is discovered, how do investigators proceed with an excavation that has to unearth and account for all the evidence in the grave without losing any important information?

There are two main methods used to excavate a mass grave:

Pedestal method:

  • The soil around the body mass is removed to just below the lower boundary of the grave, allowing complete viewing from all angles and access to all bodies along the outer margins and top of the grave.
  • The original grave walls and ramp are destroyed, but investigators do not have to stand on bodies during the excavation process since workers start at the outer boundaries and work inward.
  • This formation allows for water drainage from the site and more complete in situ photography while bodies are still in place.
  • The main disadvantage to this method is the loss of stability conferred by the earth surrounding the grave. If the central mass erodes, bodies and body parts can become displaced.

Stratigraphic method:

  • The grave is treated as a single site: bodies and artifacts are excavated from top to bottom, removing evidence in reverse order to which it was deposited into the grave.
  • Grave walls and ramps are retained, leading to a better understanding of how the grave was constructed. Tool marks and tire tracks may also be recovered.
  • Due to the even lowering of the surface grave, rainwater can pool within the confines of the grave, damaging exposed remains or eroding the body mass, but tents or shelters can be constructed over the grave to protect it during inclement weather.
  • Only bodies on the top of the mass can be accessed or viewed.
  • The bodies must be walked on by the investigators during the course of the excavation.

So which method is better?

  • Bones are separated from the body during both methods, although larger bones tends to be dissociated in the pedestal method and smaller bones in the stratigraphic method. Thus the stratigraphic method results in more complete body recoveries.
  • Decomposition tends to progress faster in bodies on the outer edges of the grave. The pedestal method exposes those bodies, leading to erosion of the mass and possible mixing of the remains.
  • Secondary or tertiary graves tend to contain more skeletonized remains and increased dissociation. Use of the pedestal method seems to accelerate slumping of the grave mass.

As a result, current scientific opinion is that the stratigraphic method is preferable where possible.

Photo credit: Gilles Peress and Press Association

I’m going to take a break from blogging for the next few weeks to enjoy the summer holidays and visiting family, but we’ll be back on August 20th with all new content. See you then!

Forensics 101: Forensic Challenges of Mass Grave Excavations

Last week we marked the 18th anniversary of the massacre of 8,100 Bosniak men and boys in Srebrenica by the Bosnian Serbs. The overwhelming majority of these victims were buried in mass graves in the remote countryside. The task for investigators following the massacre was not only finding the gravesites, but successfully excavating and identifying the victims.

The UN defines a mass grave as a location containing three or more victims who have died by extra-judicial or arbitrary executions that are not the result of an armed conflict (an extra-judicial action is one that takes place by a state or other official authority without legal process or the permission of a court).

Investigators need to determine not only time since death, but also discover any evidence of torture, the specific method of death, and the identity of the victim where possible. For many bodies, this may be a near impossible task.

Among the numerous challenges confronting researchers during mass grave excavations in Bosnia were:

  • State of the remains: Victims were often not buried immediately after death because of the need to bring in heavy equipment to dig the grave. As a result, partially decomposed remains became separated and scattered within a single gravesite. The heavy machinery used to dig mass graves and to transport and bury the dead also caused damage to both the soft tissue and the skeleton, masking original trauma and complicating the investigation.
  • Victim collection and labeling: During any forensic recovery, each separate body part is identified as an individual specimen. Any possible personal effects or related body parts must be labeled with related information for later association, leading to an incredibly complex identification scheme.
  • Secondary and tertiary graves: A large majority of the mass graves in Bosnia were reopened, and disinterred victims moved to secondary or even tertiary graves. Since this occurred anywhere from one and four months post-mortem, soft tissue degradation was well advanced, leading to significant scattering of victims’ remains across large swathes of countryside.
  • Lack of associated physical objects: Bodies were carelessly dumped into mass graves and often tightly packed to keep the site as small as possible. When personal effects were recovered, it was often impossible to determine to whom they belonged.
  • Clandestine sites: Mass graves, by design, were purposely situated in difficult-to-identify locations, usually in remote areas. In addition, the killers deliberately tried to make victim ID difficult by having their victims remove all personal effects, such as wallets and jewelry, before execution.
  • Sheer number of victims: Some mass graves in Bosnia contained up to 700 victims. This made victim recovery and identification a substantial task simply from a procedural and practical standpoint.
  • Need for large international teams: Human rights horrors such as mass graves are very difficult tasks for investigators, frequently leading to depression and fatigue. Regular replacements are required, and the specialized nature of the work involved requires an international effort to staff a large team. It will normally take 1 or 2 investigators approximately 4 days to excavate a single victim. If a grave has hundreds of victims, it can take a team of several dozen investigators months to complete.
  • Need for on-site facilities: Due to the remote nature of most mass graves, investigators must build or acquire forensic facilities for their investigation—including refrigerated storage areas, running water, decontamination areas, and sorting areas for both remains and personal effects. Provision must also be made for site security during the excavation, and accommodations for the technical staff.
  • Victim identification: The majority of mass grave victims frequently lacked sufficient dental records to allow for dental identification. As a result, pathologists and forensic anthropologists had to rely on physical features and antemortem fractures to establish victim identification.

Next week we’re going to look at the practical side of mass grave excavations—how to find the graves—and then, once they are located, how to recover the victims.

Photo credit: Wikimedia Commons and Gilles Peress.

Forensics 101: Bullet Wounds in Bone—The Skull

In a previous Forensics 101 post, we looked at how kerfs—the grooves and notches made by tools on bone—can help scientists identify the method of death in a murder investigation. But the rise of gun crime in North America has made the forensics of wound ballistics increasingly important. There are two different types of damage in this kind of wound—soft tissue and bone. In this post we’re going to strictly look at bone damage, concentrating on the skull and its very characteristic fracture patterns.

Unlike blunt force trauma, gunshot wounds often cause both an entrance and an exit wound. Investigators need to be familiar with how bone behaves in both circumstances to reconstruct the order of events and be able to piece together the details of the fatal shot. Different variables that affect the type of damage done to the bone include the velocity of the bullet (which depends on the type of gun used and the distance between the shooter and the victim), the size/caliber of the bullet, and the angle of impact.

If a bullet penetrates the skull perpendicular to the surface, a round defect is formed, often with outward radiating fractures extending from the bullet hole. The force of the bullet’s entrance increases the intracranial pressure inside the skull, causing the pieces of bone between the radiating fractures to push outwards. These ‘heaving fractures’ can be differentiated from blunt force trauma fractures because the bone sits above the plane of the skull instead of below it. The energy transfer from the bullet to the bone can be so efficient that the radiating fractures can travel through the bone to the far side of the skull faster than the bullet can traverse the brain and exit. This fact can be crucial in determining the order of fractures since a new exit fracture cannot cross an existing entrance fracture.

When a bullet strikes the skull tangentially, a characteristic ‘keyhole’ is formed—a defect that is circular at one end with tangential fractures radiating outwards in parallel, allowing the bone between them to lever out.

Exit wounds often tend to be much larger than entrance wounds for a number of reasons: the bullet is misshapen or ‘mushroomed’ from the initial bone strike, the bullet may no longer be moving along a straight trajectory, or the projectile may be tumbling end-over-end. Often large chunks of bone may be completely detached from the skull following the bullet’s exit. Sometimes, however, the bullet’s energy is spent following the initial strike; when this occurs, the bullet does not exit the skull and can be recovered later during autopsy.

Contrary to popular belief, the size of the bullet wound does not directly correlate to an exact bullet caliber because factors such as bullet shape, jacket material, stability of the bullet’s flight path and whether any other targets have been hit tangentially can affect the force with which the bullet strikes the bone.

Photo credit: Ann H. Ross, The University of Tennessee and Gérald Quatrehomme et al, Florida Atlantic University

ARC Giveaway!

A new Goodreads giveaway for a signed ARC of DEAD, WITHOUT A STONE TO TELL IT runs until April 8th! Enter here: http://bit.ly/10ghlSr

Forensics 101: Using the Bomb Curve to Date Human Remains

Ivy_Mike_-_mushroom_cloud by FastFission.jpg

Over the past month, we’ve discussed human remains that were centuries—King Richard III—if not a millennium old—King Alfred the Great. For remains of this age, classic carbon dating is the most reliable way of determining time since death. But is there a more precise way to date more recent remains, remains that might only be thirty to fifty years old, instead of six hundred? There is, and that method uses the fallout from nuclear testing following the Second World War to determine time since death.

Following the end of the Second World War, nuclear weapons were tested by the United States, the United Kingdom and Russia. The fallout from this testing radically changed the percentage of radioactive carbon—14C—in the atmosphere, spiking significantly in the early 1960’s before peaking in 1963 at a level nearly twice that of 1950. Atmospheric 14C levels fell slowly in the decades following, but still remain 15% higher than in 1950.

Average atmospheric 14CO2 for the northern hemisphere

Average atmospheric 14CO2 for the northern hemisphere

Just as strontium is incorporated into living organisms, 14C in atmospheric CO2 enters the food chain when plants use it to manufacture carbohydrates and proteins during photosynthesis. Those plants are then eaten by herbivores and become a permanent part of that animal’s bone structure. As a result, 14C from samples taken from skeletal remains after the 1950’s can be compared to the bomb curve to determine relevant dates. Samples taken from the mid-shaft of long bones represent childhood 14C levels. Spongy cancellous bone sampled from the ends of long bones will show a greater amount of turnover and remodeling that correlates closely to the date of death. Enamel from teeth captures a snapshot of the time when the tooth developed and erupted. If all the values fall in the pre-1950’s range, a different manner of aging the remains must to be used. But for those values that fall post 1950, a window of only a few years can be determined for the date of death.

The slow drop in atmospheric 14CO2 following the early 1960s is due to the signing of the Limited Test Ban Treaty. In August of 1963, representatives from the United States, Russia and the United Kingdom signed a treaty banning all nuclear testing in the atmosphere, in space or under water. In the decades that followed, 123 additional countries signed the ban (the most recent was Montenegro in 2006), leaving 58 states as non-signatory.

Photo credit: Fastfission via Wikimedia Commons and Ubelaker, DH et al. Analysis of Artificial Radiocarbon in Different Skeletal and Dental Tissue Types to Evaluate Date of Death. Journal of Forensic Sciences; May, 2006

Giveaways!

A new Goodreads giveaway starts today! I’m giving away an autographed ARC to Canadian entrants. The contest closes on March 15, 2013: http://www.goodreads.com/giveaway/show/46552-dead-without-a-stone-to-tell-it

Five Star is giving away 10 copies to American entrants, ending on March 25, 2013: http://www.goodreads.com/giveaway/show/41803-dead-without-a-stone-to-tell-it

A Facebook giveaway! Stop by Facebook for your chance to enter a Rafflecopter giveaway for a chance to win an autographed ARC: http://is.gd/iDxH1z

Forensics 101: Forensic Entomology

Determining time since death of a body more than a few days old can be problematic for investigators. They have a number of tools at their disposal—for example, the stage of decomposition/advance decay, or soil analysis to determine the extent of the body’s chemical breakdown—but the science of entomology can be a more precise way to determine when death occurred. Using knowledge of the life cycle of local carrion insects, scientists can accurately estimate a minimum time since death from one day to more than one month.

Flies:

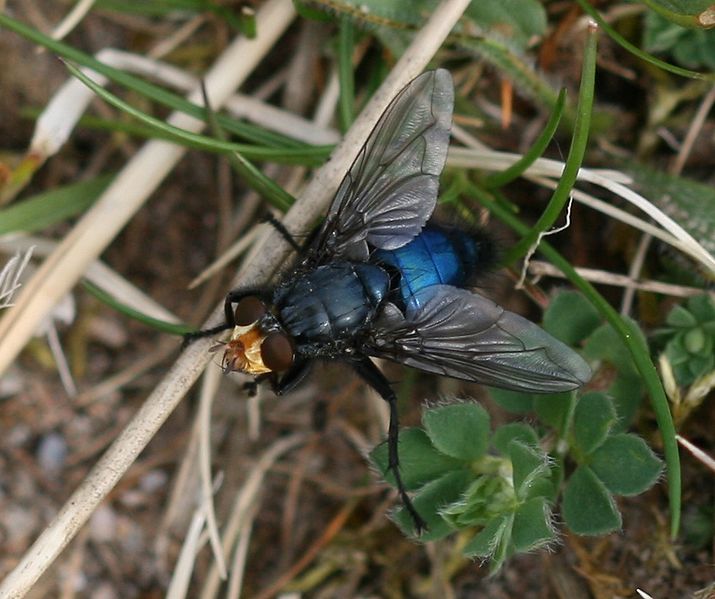
  • Flies are the first responders of the forensic entomological world, including species such as blow flies (Calliphoridae), muscid flies (Muscidae), and flesh flies (Sarcophagidae).
  • Flies are capable of burrowing and colonizing bodies buried up to 30 – 50 cm deep.
  • Blow flies are usually the first to arrive, being able to detect a body at distances up to one mile. Adult flies can arrive to colonize a corpse within minutes.
  • Most adult flies oviposit (lay eggs) on the body, preferring the moist mucous membrane openings of the face. They are also attracted to any areas of trauma; in fact, this specific colonization indicates areas of damage to the medical examiner before an autopsy is started.
  • Sarcophagidae is the exception to egg laying. It deposits larvae directly onto the corpse.
  • Fly eggs hatch within 8 – 24 hours, and the resulting larvae or maggots will feed off the corpse. A heavily colonized corpse can be completely reduced to skeleton in only a matter of weeks by nothing more than extremely active maggots during warm weather.
  • When a victim is discovered colonized by maggots, investigators will collect samples. Some larvae are sacrificed for DNA which will be analyzed to determine their species. Others will be raised in the laboratory, and scientists can observe them to determine when they pupate and develop into the adult form (this will also confirm or determine species identification). Using knowledge of the species’ life cycle, scientists will then be able to work backward to determine when eggs were laid on the corpse. This is the minimum possible time since death. The maximum time since death estimate is often dependent on the condition of the victim ie. body location, or a time of year that might slow near-instantaneous insect colonization.
  • A body undergoing decomposition moves through the stages of fresh, bloated, decay and dry. Since ovipositing flies require a moist environment for egg development, most flies are no longer attracted to the corpse by mid-way through the decay stage

Beetles:

  • Beetles tend to arrive following the fresh body stage. They will feed on any young fly larvae present as well as the flesh of the corpse itself.
  • Adult beetles will lay their eggs on the corpse; when the larvae hatch, they will consume the corpse as their sole food source.
  • As the body decomposes and dehydrates, beetles remain, feeding on the dry tissue, hair, and any fungus growing on the flesh.
  • As with flies, investigators can collect beetle larvae and hand-raise them in the lab to determine both species and a minimum time since death based on knowledge of the species’ life cycle.

The absence of carrion insects is also important information for investigators. For instance, if a decomposing body lacking in larvae was found in a wooded area in a temperate climate, investigators would likely suspect that the body had only recently been placed there after being stored indoors and out of the contact with insects normally plentiful in that environment. Conversely, if a body was placed outdoors during the winter and mummified due to cold temperatures and low humidity, once insect activity resumed with warmer weather in the spring, flies would never colonize and only beetles would be attracted to the remains.

Using knowledge of the life cycle of key insect species, scientists can determine time since death on older remains. With this information, criminal investigators can begin their investigation to determine the suspect responsible for the death in question.

Photo credit: Wikimedia Commons – Cynomya mortuorum and Philonthus

Forensics 101: Cadaver Dogs

Police and search and rescue units are sometimes assisted by service dogs—animals that are specifically trained to search out the source of very specific smells like explosives, drugs, paper money, firearms, or people. Cadaver dogs are specially trained to identify the smell of decomposition, and they can be paramount in determining the location of missing human remains, even when those remains are scattered by scavengers.

When a body decomposes, a host of very aromatic sulfur- and nitrogen-based organic compounds are produced. While they may smell putrid to a human in close quarters, the human nose is simply not sensitive enough to detect this smell at great distances or if the body is buried or covered by running water. A dog’s nose is, on average, 1,000 times more sensitive than a human’s, and some breeds are even more so. Some of the more popular breeds used in police or search and rescue units due to their extra-sensitive noses are German Shepherds, basset hounds, blood hounds, beagles, Labrador retrievers, and spaniels.

Dogs and their handlers are trained using decomposing animal sources, autopsy samples, and desiccated human bones, as well as simulated decomposition compounds. One of the challenges of cadaver dog training is training detection across the spectrum of decay scents from putrefaction to skeletonization so the animal can identify a body at any stage postmortem.

The animals are trained to be both trailing and air scent dogs. Trailing scents are useful if a body has been moved and bodily fluids have fallen to the ground; the dog will follow the scent along the ground until it can find the source of the trail. Air scent dogs will follow an odor in the breeze that is blown outwards in a widening cone shape from the source. The smell will become stronger the closer the dog comes to the source, and the dog is trained to follow that more concentrated scent.

When a cadaver dog locates the source of the compound it is trained to recognize, it will ‘alert’. The alert is specific to each animal or trainer and is instantly recognizable to that trainer—a bark, or the animal sitting or lying down to indicate recognition of the smell in that particular location.

With the help of handlers and fully trained cadaver dogs, human remains can be found following clandestine burials, natural disasters or missing persons searches. Once the remains are found, then the process of identification and determining the cause of death can begin, allowing closure for the family, and, perhaps, justice for the dead.

Photo credit: Canadian Search Dog Association

Forensics 101: Tool Marks in Bone

When skeletonized human remains are recovered, sometimes the only evidence police and scientists have to determine cause of death is the bones themselves. The bones are examined to identify any remnants of tool marks—also called kerf marks—that might indicate a traumatic injury. If the body has been dismembered, those kerf marks can lead directly to the tool(s) used postmortem, even if they might not directly suggest a cause of death.

Any sharp implement applied to bone with sufficient force will leave a distinctive imprint, be it scavenger teeth or a cutting tool. Examination of the bone both macroscopically (using the naked eye) and microscopically (using a light microscope/scanning electron microscope for magnification) can provide crucial information, since each tool leaves a characteristic mark that can assist in its identification.

Types of cutting tools:

Knives: Knives are narrow bladed and leave a corresponding narrow ‘V’-shaped trough in the bone. They are single or double-bladed (double-bladed knives can leave an opposite ‘V’-shaped trough in surrounding bone) and tend to leave behind only microscopic striations.


Saw: Saw blades come in many different form factors, but uniformly leave a wider, square-bottomed trough in bone. They tend to leave distinguishable striations that are easily seen by the naked eye. Individual blade and tooth size can be identified based on the striations, as can the blade type—ie. straight or rotary. Saw kerfs often have characteristic accessory marks, such as false start notches, especially when manual saws are used.


Axe: Like a knife, an axe leaves a smooth ‘V’-shaped trough in the bone, but the defect is very wide and is often significantly deeper due to the lever action of swinging an axe. These kerf marks are often accompanied by microscopic or macroscopic impact fractures and/or flaking surrounding the contact site.


Besides providing information about the type of tool used, kerf marks also provide contextual information, including the handedness of the attacker, the relative positions of attacker and victim, whether the wound was self-inflicted, and the motion of the blade (cut vs. stab). With this information, police can determine not only the most likely weapon used, but how the murder was committed, and these details can often be used to definitely identify the murderer.

Forensics 101: DNA Profiling for Identification

VNTR gel.gif

Last week, I covered DNA as a tool for identifying remains. This week, I’m going to discuss how scientists test DNA to prove an identifying match.

DNA strands contain different regions, many of which are genes that code for essential protein products. But a very large proportion of sequences don’t code for any currently known genes. These sequences also contain short tandem repeats (STR)—small snippets of DNA that are two to six base pairs long and repeat from three to one hundred times in a row. The locations of these repetitive sections are called variable number tandem repeats (VNTR). Genetically speaking, unrelated individuals will have different numbers of repeated STR segments at known VNTR locations, but related family members will share similar numbers of repeated segments. Since human offspring share a combination of traits from both parents, the power of DNA profiling lies in analyzing numerous segments to definitively prove identification. In North America, it’s standard protocol to analyze thirteen specific locations simultaneously.

Scientists use the polymerase chain reaction (PCR) to examine known VNTR locations. PCR is an assay used to amplify small amounts of specific DNA sequences so they can be visualized later on a gel (we’ll look at PCR in more detail in a future Forensics 101 post). The picture above illustrates typical PCR results. In this case, a gel shows the difference in length of the D1S80 VNTR location of six unrelated individuals, flanked on each side by a marker of known size. As you can see, the pattern for each individual subject is different in each vertical lane.

An example of DNA profiling between a father (1), mother (3) and child (2).

An example of DNA profiling between a father (1), mother (3) and child (2).

There are two types of matches in DNA profiling—identity and inheritance. In identity matching, the unknown sample is tested against a known individual’s DNA. If the two samples match exactly, then the unknown person is identified as the known donor. In inheritance matching, the unknown sample is tested against a sample drawn from a potential family member. If parents are used as donors, then each band in the unknown sample must match with one of the two parents. If a more distant relation is used, then degrees of relatedness are calculated into the expected results.

The bottom line of this testing is that the unknown sample must be tested against a sample (blood, hair, tissue etc.) of known origin. In the case of Richard III’s ancestors, separated by five centuries from the king himself, genomic DNA profiling as described above simply wouldn’t be feasible due to the number of generations separating Richard III and his current ancestors. But when this same method is applied to mitochondrial DNA, because of the consistency of maternal transmission, identical or near identical results are expected between family members, even those separated by multiple generations.

Next week, we’ll look at the historical details surrounding the Princes in the Tower, the young boys Richard III is accused of murdering. Nearly one hundred years after their disappearance, bones were recovered at the Tower of London. But where they of the missing princes? See you next week to find out…

Photo credit: PaleWhaleGale and Magnus Manske

Forensics 101: Tracing Lineage Through Maternal Mitochondrial DNA

DNA-molecule3.jpg

Deoxyribonucleic Acid (DNA)Last week in a post on the potential discovery of Richard III’s remains, I wrote that scientists hope to confirm the identity of the remains based on DNA, specifically mitochondrial DNA. Over the next few weeks, I’m going to explain DNA identification, starting with the basics and then branching out into how it is used to name the dead.

DNA (deoxyribonucleic acid) is the code of life, the genetic information contained in every cell in the form of twenty-three pairs of chromosomes (except for sperm and eggs cells which have twenty-three single chromosomes). The information contained in this genomic DNA specifies everything about us, from how we look to which health problems we’ll have an increased likelihood of developing. But there is also another kind of DNA contained in our cells—mitochondrial DNA (mtDNA).

Mitochondria are the power houses in our cells, the organelles or cellular structures that are responsible for producing the chemical energy required for every cellular activity—from protein production to ion transport to cellular reproduction. But unlike other organelles, mitochondria have their own unique tiny DNA genome—mtDNA. Due to the process of human fertilization, these small bits of DNA are transmitted in family lineages only through the maternal line.

Electron micrograph of two mitochondria

Electron micrograph of two mitochondria

An egg cell is a stripped down version of a typical cell in the body; essentially it only contains a nucleus carrying twenty-three single chromosomes plus several hundred mitochondria in the cytoplasm. A sperm cell is a small sack of DNA attached to a long tail for mobility, the base of which is packed with energy producing mitochondria to fuel the journey. At the moment of fertilization, the tiny sperm head fuses with the egg membrane and injects its DNA while the tail drops off and is lost. As a result, the only DNA inserted into the egg cell is the genomic DNA contained within the sperm head. All mitochondrial DNA that is then replicated as the fertilized zygote splits from one cell into approximately one hundred trillion cells comes solely from the mother. Fortunately, due to the nature of its sequences, mtDNA has a very low mutation rate. In other words, the same mtDNA is passed from grandmother to mother to child through the generations. Genetic testing of specific sequences of those mtDNA samples, even if separated by many generations, can definitively prove a family match.

Due to the number of copies of mitochondrial DNA in each cell (providing approximately five hundred identical copies of each gene versus two copies on the cell’s genomic DNA), forensic anthropologists often are more successful recovering mtDNA than genomic DNA from ancient and historical samples. So the combination of DNA yield and the consistency of the maternal line can provide identification, even for remains over five hundred years old.

Next week we’ll look more specifically at the kind of testing used to make a genetic match between samples providing conclusive DNA evidence for identification.

Photo credit: ynse and Louisa Howard